Sunday, March 16, 2014

So we have alot of parts here... what's the basics set I need to get started.


In it's essence, you need fire, Steel(iron) something to hit it on and something to hit it with.

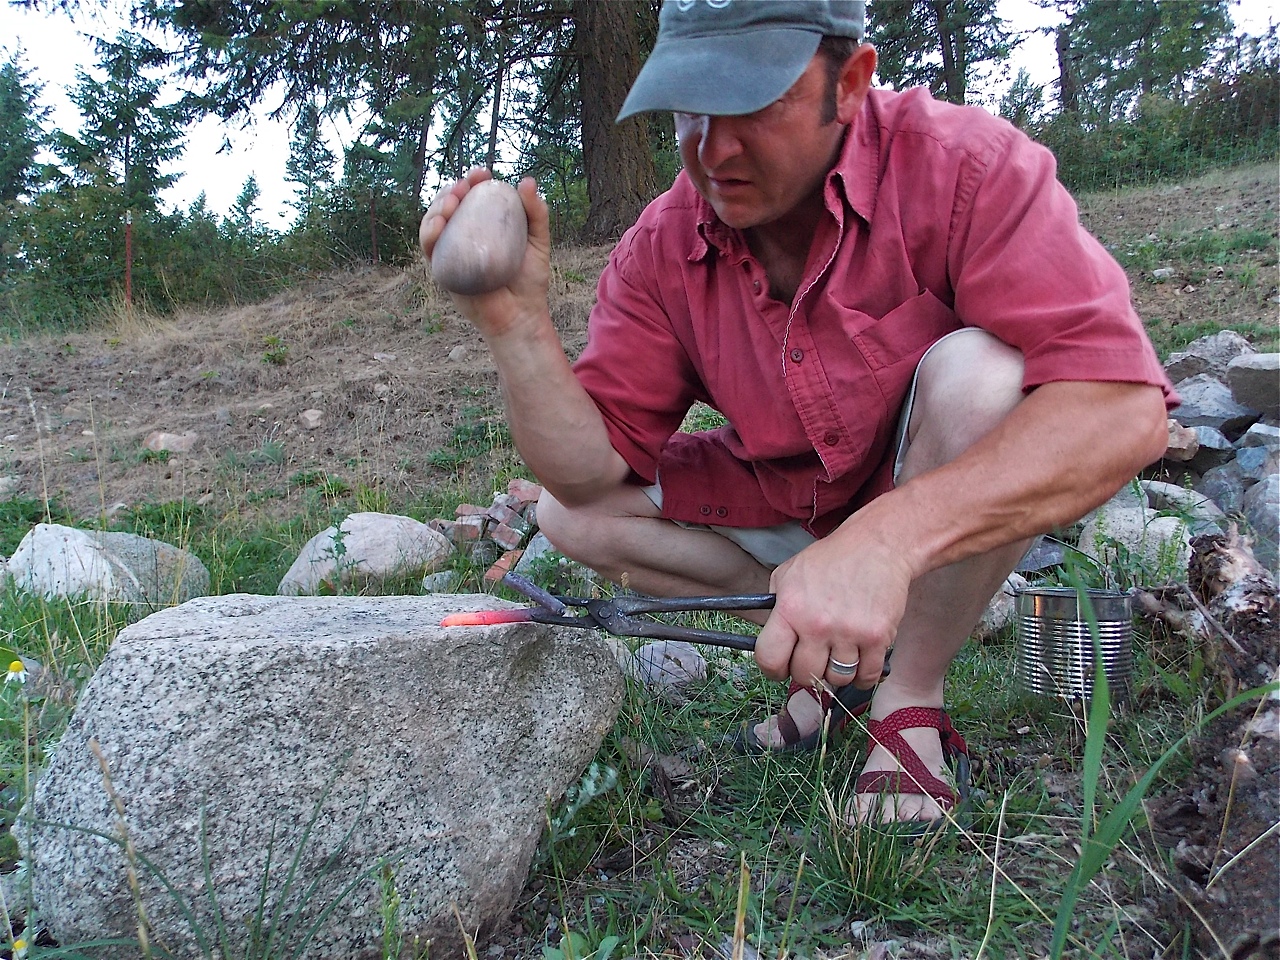
2 rocks will honestly work better than you might think... But that's not the kind of answer you're looking for...

A Starter Set

Centaur Forge sells a Starter kits that's pretty good.


You can get it Here, but what if you need to do it on the cheap... that's what this blog is partially about. First off skip the DVD and the Block of bees wax in the picture.

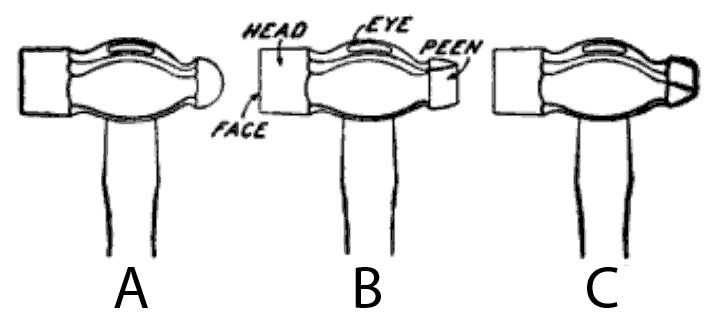
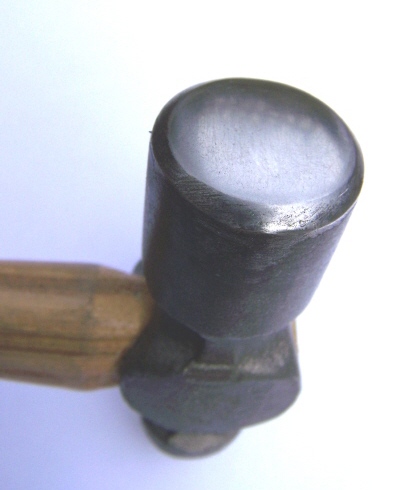
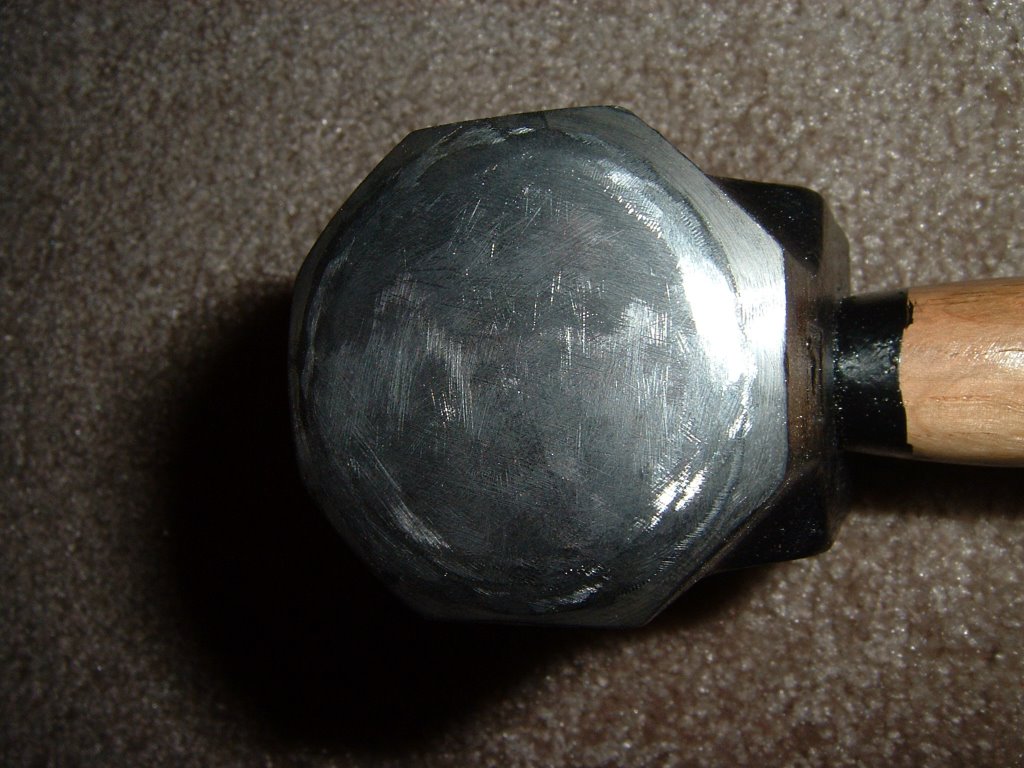
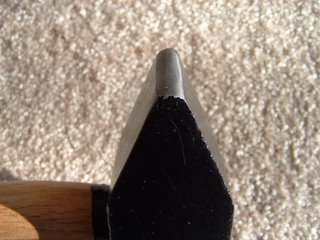
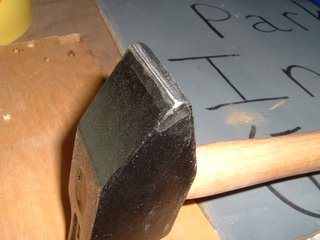
You need A decent hammer. a straight or cross peen will work great after you
Dress the face.
Here is a cheap one from harbor freight. Not great, the steel is ok but the heat treat is meh. it'll work great to get you started.

3 lb cross peen hammer it's a bit heavy to start out with so if  you can find a 2lb one that's better. If not, just choke up on the grip towards the head till you start to get some control. Let the weight of the hammer do the work, you just guide it as it falls.

Eye and or Ear protection... for coal or similar, any regular shop stuff will do... For propane forging you need special ones that block both the UV light and the IR light.. or it'll jack up your eyes.
before you get them, you can't really look into the forge safely for more than a bit. think sunburn on the inside of your eyes...

Gloves, and a leather apron, are optional but good ideas, you can get these at harbor freight too..

You need some kind of wire brush to remove forge scale...anytime will work as long as the wires are steel and will not melt out of the brush ...

This is the cheapest I've found (again harbor freight)


Steel wire brush

Next you need something to cut metal with... anything will do, but if you have access to electricity I suggest a angle grinder with a asst. of disks for cutting sanding and Grinding.. for $25+ for a set, it's just too good a deal... be super careful though and use hand eye and ear proptection, because Grinders love to feast on human flesh... be warned, and don't get lazy or stupid. Look in my other posts for more detail.

With this and a long piece of metal and or a cheap as pair of pliers of vice grips (or even better one of the easy tongs I show how to make in other posts) you are upto the minimum levels.

If you can't afford that, get a cheap hacksaw and the best hacksaw blades you can afford.


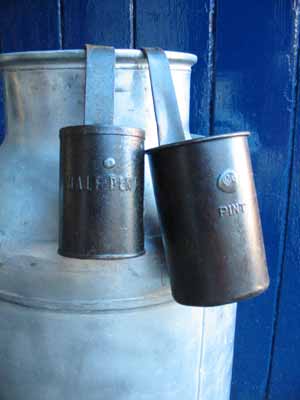
Also extremely handy is something to hold water as a quench tub, to cool off the steel. Plastic will work for a while, just be careful not to let hot stuff touch the sides or bottom...

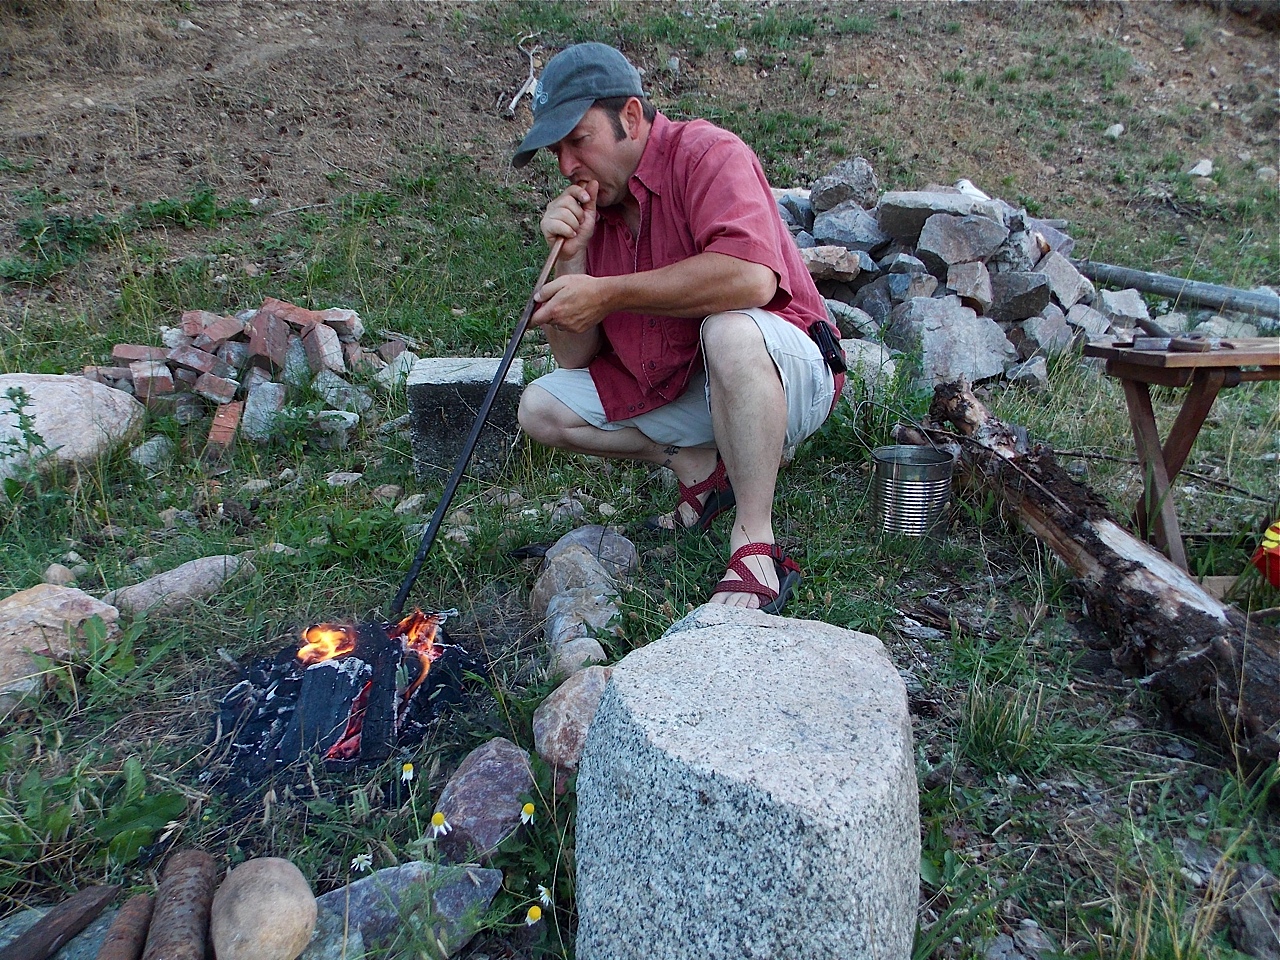
If you are using a coal fire, I suggest at you make a fire rake and then rivet a tin can onto a handle and make a ladle for your quench bucket.


like this:


Though to be honest I prefer one make just like the fire rake,and the flat bent part of the rake is bent to fit the can, and then riveted (or bolted) on... I can't find a good pic at the moment so kind of like this:

no matter the fire make  at least 2 pairs of BSA Ez Tongs before you go any further.

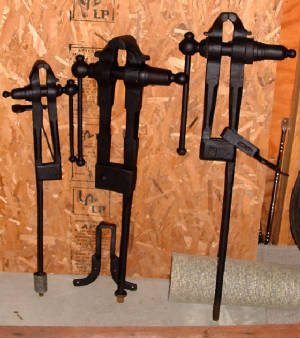
You will need a vice... if you can possibly get it, any vice is better than none..

Improvise an Forge

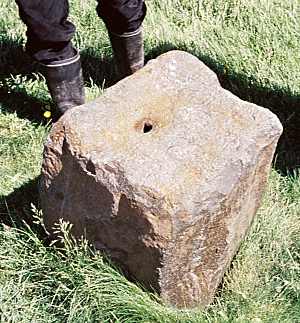
and Find something to use as an anvil

and you are ready to make something fun!

#3 - Your very first Project..

The first thing you are going to need if you are using coal or charcoal or a similar fire source, is a way to move the fuel around...

Like a fire rake...


You can see one on the left below.

 You just hammer one end flat then bend it 90 degrees. You can put a fancy loop on one need to make it easier to hang up when you are not using it. but in the end it's just an l shape to push and pull the coal around. Mine the "foot" of the L is curved, mike make a difference might not...


A pick and a shovel are nice too, but you can get by with a bag of coal, a rake to move the coal in the forge and a bowl to shovel it into the forge with.

#1 - A simple cheap primitive forge...


Okay a forge really only consists of a place to make your metal hot.. If you are patient you can use a camp fire and get work done.


The way to get the metal hotter faster is to add air. More air, more oxygen, more heat.

The simplest ways are blowing on it through a tube so your face doesnt' get too hot.. Just don't ever inhale...ever...really don't.


A simple basic forge with better air delivery can be built out of easily available parts

Here on Instructable

He's using galvanized pipe.. .I'd avoid that as Zinc fumes can literally kill you...go "black iron" or some other safer pipe.

Google "How to build a simple forge: to learn many more ways to build a forge, most of which are much nicer to use than the simple ones shown here. I'm just trying to show the very basics of getting started. Youtube has hundreds of options. Also Google "Brake Drum Forge" if you have access to scrap it's the easiest to build. (the link above starts simple then gets hi tech about the time teh clinker breaker is added... smear sum clay around and it would have worked like it was...

Another common starter forge uses a few bricks, some pipe and a hair dryer (on air i assume), or camping bed air pump  to blow air into the forge.  These are connected together to the pipe via duct tape. a 12v car vent fan blower works great too...


In ancient times they built the first forges on hills, to catch the natural breezes and redirect them into the forge. I hope to make a forge like this, but it's awfully dry in Texas were we have land.

Primitive forgets used bellows of skin with two sticks to open and close the opening...

Or a pair of bellows like drums with a valve inside and 2 tubes joining before they get to the fire.


A small  gap is left so hot air does not get sucked back into the bellows.

If you have even a little money to spend, a 12v fan from a vehicle can be had pretty cheaply at an auto salvage place and works pretty well... an 120v ac one is what my coal forge uses. It' rigged into a light dimmer to let me control the air flow.I think it was $40 at mcmaster carr or grainger.

The real key to remember is all you need is a fire... use what you have... my first coal forge blower was a 12 computer fan, screwed into a cardboard box, with a flexible hose coming out of it...Improvise...

Here is a bellow made from 2 cans 1 leather valve and some pipe... the big can is full of water, when you push the smaller can it, it squeezes out the water.


How to make bellows

You wanna see a guy making good stuff uber priamtive?

Malawi smith youtube video


Hammers if you've got one... there is somethign you need to do before you want to blacksmith with it...(Dressing the face_

Basically hammers as they come from the store are not quite ready for blacksmithing.
 Before we can talk about it here are the parts of the hammer.


New hammers have a bevel around the rim with a sharp edge. You can see it on this cross peen hammer


If you don't remove this, if you hammer even slightly crooked it'll leave marks all over your metal


Here is a pic of a hammer just slightly softened.. which helps to prevent marks (though I suggest more sanding) You can still see the bevel, but the line separating it from the face is softened.


When you have this rounder shape you can tilt the hammer to various angles to do slightly different operations(2 way stretch or1 way stretch, etc).

Here is one much more softened but needing a bit of polishing (any marks on the hammer face are transferred to your work like stamps)

Lots of folks like different shapes...

Here is a much more in depth article (though it lacks pictures) on the subject

anvilfire.com

another good one

Video


Here you can see the peen of a hammer has sharp edges from the factory too.


You'll want to do the same to the back or Peen side of you hammers, to prevent them marking the steel as you work too.


Now your hammer is ready to polish as much as you care to (more is better within limits)


Then Bang on hot iron and make cool stuff.

#8 - Where to learn WTF I'm doing with all this hot stuff.(Books To Learn From)

So you are starting to get enough gear put together that you actually want to learn something about what you are doing with these fun tools...


Start here:

Free PDF of Great books

These are free older editions of the best books out there, if you like them buy a copy of the latest one,
think of it as voting asking the guy to write another book that's even better!

The Complete Modern Blacksmith (Free pdf of an early version of , if you like it get the newest version on amazon)

Same Guys Book On Making tools

Free PDF of Wayne Goddards $50 knife shop


Books On Amazon, that you pay for but I think are worth it.


When I started learning, this was by far the best book I read... It's the only one that
actually taught things like the different kinds of hammer blows and what they are for, etc...
A Blacksmithing Primer


I liked it so much I bought the DVD set for $200 (it's a lot less now, like $139) and loved it too.
The DVD Set

The Complete Modern Blacksmith
New Edge Of The Anvil
The Backyard Blacksmith (Decorative Stuff)

Free Out Of Print Books

Thirdly there are literally GOBS of old books from the 18 and 19 hundreds in public domain, for free out on the web...


Here

Here

Here too

Even more

more, might have to be a member of iforgeiron.com(free)

Just google Free blacksmithing books

Next there are tons of Videos on blacksmthing on You Tube Here

And great sites with info for newcomers out there like www.anvilfire.com

Massive numbers of great tutorials on specific projects

IForge, (great folks here)

And Blacksmiths forums like this one:
http://www.iforgeiron.com/ (great info, but a very few of the folks are straight up assholes)

Please note that as far as I can tell there is no connection between IForge, and IForgeIron.com
I like IForgeIron.Com, but some of the people on the forums can be a little douche-y, you are warned)


Here is my personal stash of free PDFs off the web in many places:

Google Drive Folder

See the books summary page to find more book posts

Pre made tong blanks


Another option for making tongs is to get pre cut tong blanks...


Tong blanks are a comon way to quickly make tongs... there are several kinds but the ones below are best if you don't really know what your doing 100% yet...

Heat them up, twist the jaw, round the reigns (handles) if you want(or not) , and rivet.

they currently cost about $9 a pair for the basic shaped ones.


You can get them from here( pre drilled but don't include a rivet)

Polar bear forge

or here (Not pre drilled, but includes a rivet)

The guy who did it first


A video on how to make them into working tongs.


A guy selling Poz tong blanks, a different style, that's easy to make. Basically you just split the 
flat parts of the jaw, or reforge it. Poz style tongs are supposed to be lighter than the two above, I haven't Ordered yet these, so I can't say one way or another.

Poz Blanks on Blacksmith Supply


#1 - No tongs for blacksmithing? The simplest soloution of all...


No tongs? want to smith?

Just use long pieces of steel and forge one end. Keep a bucket of water to cool it off in periodiaclly.


It's really as simple as that...

Also to get started you can use pliers of all sizes and vice grips (which were invented by a blacksmith trying to make better tongs) Longer is better if you can control them...

#2 - Something to beat upon.. improvising an anvill


Obviously if you can get an anvil that's what you want...

but what if you cant' get one yet?

One of the most famous Smiths of the Viking sagas used and anvil that was just a large flat piece of very hard rock.


 Lots of primitive peoples do this still


Bigger and heavier is better, the less it wiggles or jumps the more of you force goes into moving the metal... but anything can work.. a rock, a curb, the hitch of a truck...


Lots of 3rd world anvils are just pieces of metal stuck in teh ground, or wedged into a log, or concreted down...

Here the famous Kukri is forged, using a sledge hammer head as the anvil:

The Video
Or large truck axles and other big pieces of metal

And of course the ubiquitous rail road track anvil


Most folks put the weigh under the part of the track the hit for more stabilty

OR a chunk of carbo steel
Here are listings for 4140 (a good steel for hammers and anvils)

http://www.ebay.com/bhp/4140-steel

If you have 2" by 2" and enough length to mount it to a log or stump that will do...

If you goto your local Steel/metal shop (most citys have several) and ask to go through their drops to buy a hunk of steel.. you can usually find something, and it's pretty cheap and no shipping. goto home depot or lowes and ask the guy who works in that area where the nearest steel shop is.

Here is a super easy one if you have access to a welder i saw on youtube
http://forgetool.blogspot.com/2014/12/neat-russian-bushcraft-stump-anvil.html

The point here is be creative.. get something hard, and stable and get metal hot and hit it and
make beautiful things!


Everyone needs a vice... or vise..


After a hammer a fire and something for an anvil (even just a curb or a flat rock)

the next thing you need it help holidng metal so you can work on it... one answer is tongs...

But befire even that, i suggest a vice..

Harb freight has small engineers vices for a very reasonable price..

 Harbor freight 3in vice

For blacksmithing make sure you can flip the jaws round to the smooth side so you don't mark up your metal.

Bigger is better, the more solidly mounted the better.

Best of all what's called a POST vice, or a Leg vice... they are stupid expensive on ebay, but if you search around craigslist and auctions, or goto blacksmith gatherings, you can get them much more reasonably., they come in all sizes... bigger is better, but you can do alot on a small pne...


#4 - Cut and weld tongs


Cut And Weld Tongs 

The Next set of tongs  is a big more complicated, but you only need 2 things new.
I really like them, becasue you can make a set of jaw out of angle iron, and have a great set for holdtin round and square stock (you need one pair for each diameter of stock).

For this set you need a Welder (or access to a buddy who welds) and a way to cut metal...

Personally for a  new guys starting on the cheap...i like  4" or 4.5" grinder at Harbor Freight, plus a pack of assorted disks (including cutting disks) can be had on sale for around $25. that's a hard price to beat. The 4" grinders used to be the cheapest, but lately it's the 4.5" ones.. just pick one size and stick with it... I have 3 of the same size,  one with a grinding disk, one with a sanding flap wheel and one with a cutting disk so I don't have to change them out while working.

Grinder:
4.5 in grinder

and the pack of assorted disks

Asst. Disk set

On sale all of that can be had for under $25.

But you can totally so this with a Hand Hacksaw, and a Drill (plus access to a welder)

Next, you need to cut two parallelograms out of bar stock, drill a hole in the center for the rivet.. this is the "joint" of your tongs.(See pic below)


 Next weld on reigns( handles)  on onside, at the corner sticking out,
and Jaws (the part that holds the metal). on the opposite site. You make the two identical... when you flip and rivet everything works out even though it feels weird to make 2 of the same thing the first time....... (See pic below)

Remember you make two identical, the rotation and flip handles the symmetry.

The jaws can be made any shape you want flat, pipe, angle iron... super easy if you have a welder

If you make the flat jaws in the diagram below, it's super easy to heat them up, put the new flat stock you want in the jaws and hammer it till it fits tightly...they look odd all bent together then flat, but they work ok.. the heavier the stuff you want to forge, the heavier the tongs you need.Make a couple light ones (1/8 stock for joint & jaws) to get you started. then make what you need, start practicing the forged ones too.. but this gets you started.

Ignore all the text below, it didn't' scale, it's basically what i said here.


 Here are several style the guy on ebay used to make...to hold different stock...


  Including V-bit (though I just welded my angle iron directly to the parallelogram)


Once you've made the ez twist tongs in my previous post, try these...

Make a set of jaws as before using the twist method previously mentioned or by forging them...., and weld on some more comfortable round reigns (handles)

Another twist is to cut pieces off flat barstock, and weld on whatever jaws you want, and rivet them up.


More...