So I'm trying to build a Frosty's Tee Burner...
Let me start off by saying I'm a reasonably tool savvy guy, I do black smithing, work on my own car, make armor, weld, have all the normal wood working tools, and a few specialized metal tools, like a mini metal lathe...
That said, for a burner that's supposed to take 20 min and cost $20, sure as hell isn't. Mostly it's because of tools i needed to buy, wrong tools, tools not working how I expected (IE drill bit I had was to long to fit on lathe once tee was chucked up etc., etc...) It's been nothing but tiny steps forward, followed by heading to the internet to buy another part.
So I'm putting this blog post together to document the process so you can learn from my mistakes... and to link the exact parts I'm buying for each step... So you don't get the wrong ones...and maybe to earn enough in referrals to by myself a free black Smithing book once a decade or so. :D
So if I can I'll link to amazon..
First off, here is the exact Tweeco Mig tip I ordered... I'll let you know if it works, as the .035 tips I had for my harbor freight flux Mig welder did not (The welder is long gone, but the tips are still here)
$1 Prime shipped tweeco mig tip
This is one tip, but a pack of 10 from other places are $18... so order several
Tee Fittings:
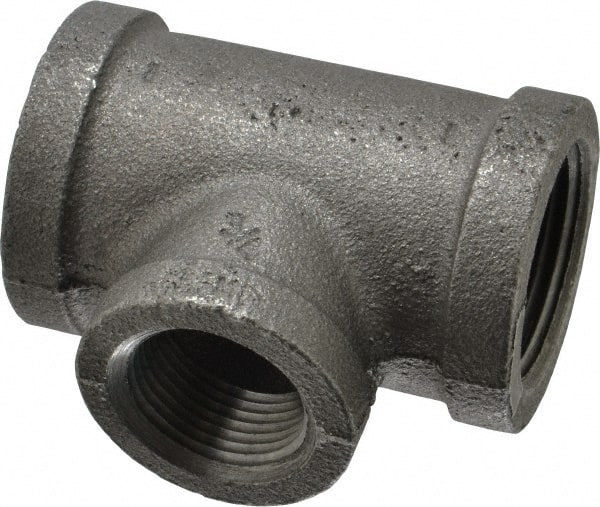
I've ordered 4 different tee fittings online and every single one has been the wrong type where the "straight line" fittings are 1" & 3/4" and the 90degree fitting is 1"... IE The kind you need for make a side arm burner, but not the kind you need for a tee burner...
Wrong kind: 3/4" left, 1" up (or down) and 1" Right
(Image is for shape, ignore the sizes on the pictured fittings)

Right kind: 1" left, 1" right, 3/4 down(or up).
So my advice is, just go to a plumbing supply place where you can be sure you got the right one..If I find a place where I can get the correct ones I'll link to them. Ordering them Prime shipped from Amazon is roughly $10 each...
You need to be aware that I'm not following Frosty's plans exactly, I'm replacing the copper flare fittings with short runs of copper pipe and propane quick connectors, to match my existing forge..
After I use a part and it's the correct part and works I'll add it to the list here at the Bottom:
Steps I've done so far.
Ordered wrong tee fitting #1
Ordered wrong tee fitting #2
Bought correct Tee fitting at plumbing store in person
Bought a bunch of parts on amazon
Tried to put correct tee fitting into my mini metal lathe, didn't fit ordered close pipe nipple to chuck up and screw fitting onto.
Chucked up close nipple to put te onn to drill hole in center of tee fitting... Hole NOt drilled in center of tee fitting.
Ground a Flat spot on tee fitting, so bit will not wander to drill off center hole... Test fit before drilling this time... bit not on center of tee fitting. Adjusted close pipe nipple to it's properly centered
Don't use close pipe nipple, as the screw thread is tapered.. Making it a huge pain to get straight
Get a longer fitting and cut it in half so you can chuck it up on the pipe not the threads... fording it to chuck up straight the first time
Failed parts
Be
aware the common 1/4" tap is 1/4-20, not 1/4-28, I pulled the 1/4 in
tap out of my tool box, double checked the instructions,
it tapped fine but then hole tapped was too large for the mig tip,. Wound up going with the straight frosty desing to get fittgins that would tap correctly
Verified Correct Parts:
Note: this did not fit the tap handle I had that the other tap fit into... You need a larger capacity tap handle
UN Verified Parts:
Be careful, the normal 1/4 in tap, is 1/4-20, not 1/4-28, that's another trip to Amazon for me!
Tweeco is the Magic word on the mig tips, the ones i had around the shop did not fit... back to the internet!
My current choice of the correct Tee Fitting
The secret appears to be 1X1X3/4 not 1X3/4X1, at least the one pictured is correct.
I ordered one from Amazon to test this theory. I'll let you know how it comes out.
This has several virtues, 1 it has a valve already in it, that valve on my current forge is super handy. #2 if something goes wrong my the new forge I can quickly disconnect the propane. #3 easy to unhook to move around and swap forges for testing. #4 The cheap Chinese forge I got on ebay many years ago, came with this on it...(Boy I wish I could get another one.. $160, with regulator & hoses.. been a great little forge)
It fits fine, just not moving it till I fire up the burner.
The one on my cheap Chinese forge came with a gauge and a needle valve, this one is cheaper and comes with a braided hose, I'll let you know how it works out.
No comments:
Post a Comment