So you wanna be a black smith...
You haven't got much money...
You don't have any tools of your own...(if you have any of these tools, even sorta, use that)
You don't want to goto garage sales, flea markets and dig for cheap used stuff (still your best option)
What is the minimum set of cheap tools you need to get started doing "real" blacksmithing..
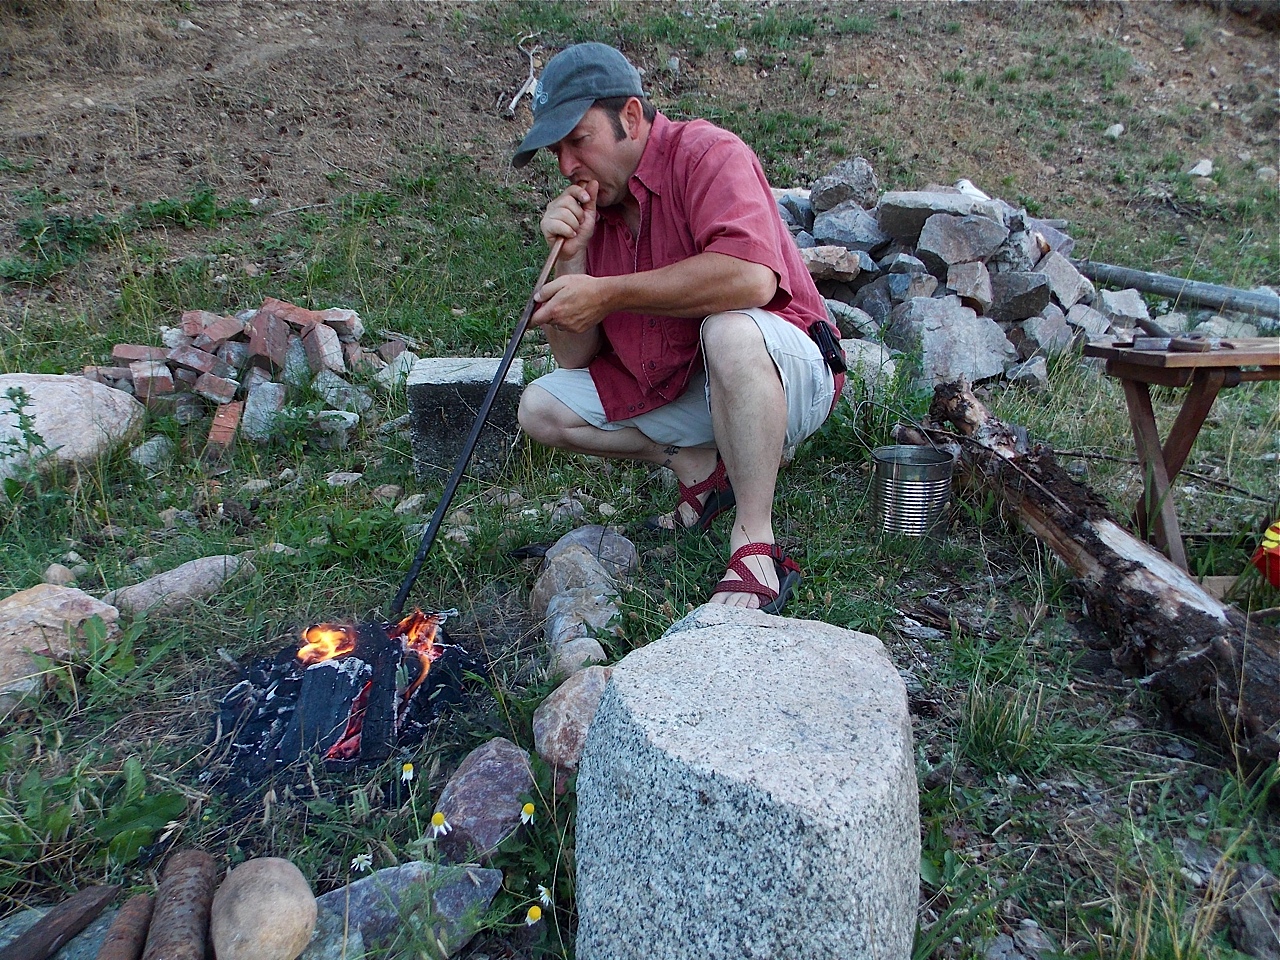
First off, you can use 2 rocks and a campfire, but that is not what I'm on about here.
This is a list of cheap tools, in the order I think you should get them to build up your ability to make stuff. These are not quality tools to last your whole life.. This is cheap crap to get you started.. If you use them till they die, then if you can afford it , get a good quality one... If not, get another cheap one, but cheap tools always make you suffer long term.
Alot of this is going to be Harbor Freight (
HF), I have 2 of them in my town, so no shipping, cheap useable (some barely) tools... Same tools from another source will work as good or better.
You don't have to to get everything on this list... if you get 1-9, plus build a forge, you will be ready to start... but as you get a little spare cash, this is the order I think you should go. If you use one of these tools till they die, you have proven that you need to buy a quality tool next time. but the goal of this post is least dollars for most ability to make things. Least Bucks, Most Bang.
A word about Harbor Freight. they have sales constantly, if you are going to make a big purchase (big to you) get on their emailing list, and check their adds in the paper... Most of the things here that are not just a couple bucks, go on sale all the time.. wait a month or two and save some bucks..
3 or 4 times a year they put out a 20% off any one thing in the store coupon.. clip these and stash them (check them for expiration)... buying a big item on sale, and taking an additional 20% off, is fairly tasty!
Obviously all logical disclaimers apply, all this stuff can hurt you.. so this is legally for entertainment only... If you get hurt, it was your call, officially stay in bed and be safe, don't go outside unless you have to...
1. A Hammer, nope I'm just kidding..
Before you buy a hammer, get effing eye protection.. I'm that serious... eyes don't grow back.
HF Safety Glasses
$2 if you can't afford an extra $2 for eye protection, don't blacksmith, you are too poor, go beg on the street till you have $2. then go get 2 rocks and a camp fire and have at it. HF even has cheaper ones, but these are more comfortable
Total: $2
2. Something to hit...
You can get rebar 1/2" by 12" at home depot for a $1.. that's right a buck. You can use 2 rocks, or a rock and curb. buy longer rebar or steel if you can get it... 2-3 feet so the cool end, doesn't' get hot. That way you don't need tongs yet.
Rebar at Homedepot
Total: $3
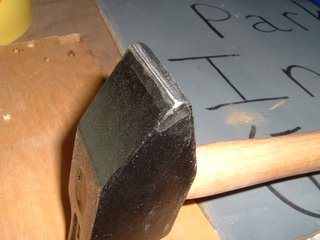
3. A hammer
Any hammer will do if you are this poor.. Here is a good cheap starter (they have a 2lb one in the store, but not on the site, get that first if you can, but here is the 3 lb one)
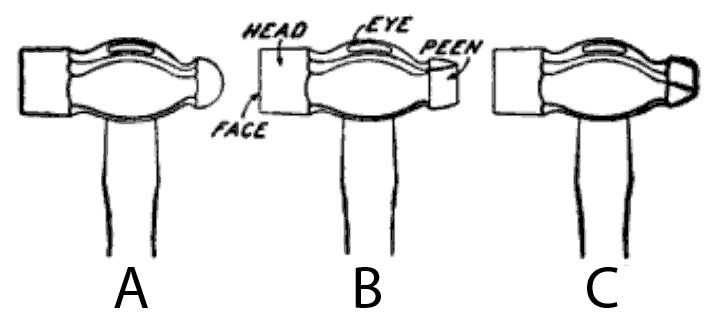
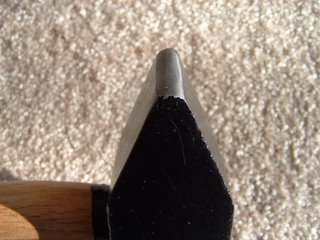
3lb straight peen hammer HF
Any hammer will do, and type of peen will do (the peen is for stretching metal, different shapes just do it different directions)... If you are buying it want a hardwood handle, not fiberglass...that way if it breaks you make another..plus you can take it apart, forge or,weld new shapes, and stick the handle back on.(putting it back on can have a couple steps but its easy)
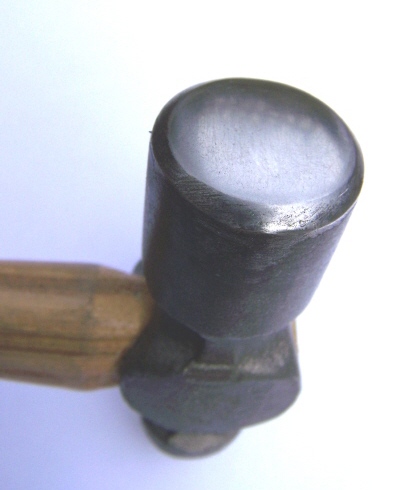
Google how to dress the face of your hammer before you use it so it puts fewer marks in the metal and you can use the edge to move metal like a peen. I repeat dress your hammer face before using it.
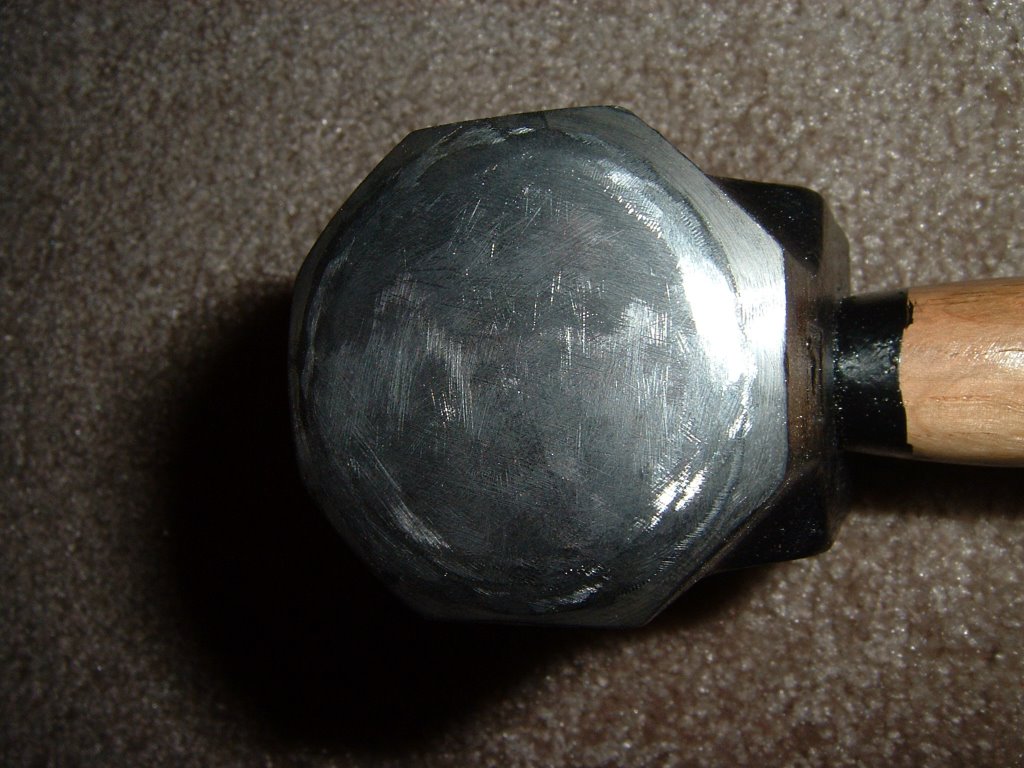
More expensive options... I like my 2lb Nordic rounding hammer, it was cheap and I got to try all those neat Bryan Brazeal techniques. still took a little face dressing
http://www.centaurforge.com/Nordic-2-lb-Hard-Turned-Rounding-Hammer/productinfo/285HT/
To face Dress a hammer all by hand you will need a file, if you only have one I reccomend a fine round back one. But here is a cheap round back file
http://www.harborfreight.com/hand-tools/files/8-inch-half-round-file-96629.html
$4
Total: $15
4. Leather Gloves...
If you are using a 12" piece of rebar, you need leather gloves.. if not, this is a bit optional, but i strongly suggest it at least for your metal holding hand. If you can afford better gloves, buy more comfortable ones.. with some stretch to the leather.. but this list is about cheap, so cheap it is. $1.69.. I don't' want to bother with pennies so call is $2
Total: $17
5. Cutting
A hack saw is the cheapest way to cut cold metal. If you do get a hack saw, this is the Biggest tool you ought to invest non Harbor freight money in.. The saw itself is not a big deal but get the best hacksaw blade you can afford. it's really a huge difference.. and not a lot of cash difference. I'll list better cutting tools later.. Skip this and goto them if you can afford to, but this list is about cheap and this is cheap $5 Get bi metal blades.
HF Hack Saw
Lenox and Klein are better brands of blades.. be sure to put wax or soap on the blade to lubricate it for less heat.. heat is the enemy of hacksaw blades. More teeth per inch is usually better (though slower).. A little money invested in blades will make a huge difference. Keep everything nice and tight when using it... Trust me.
Bahco, Starrette and Facom are even better...
10 Bahco blades, on amazon $20
Total: $22
6. A Forge
There are lots of articles on cheap forges, you can use a camp fire if you need to , Google away and build something. No $ Added, You really just need to scrounge up stuff to make this cheap.There is not really a way to buy a complete forge cheap unless you just get lucky. But you can make one yourself really easily from just about anything
See my Blog post:
http://forgetool.blogspot.com/2014/03/a-simple-cheap-primitive-forge.html
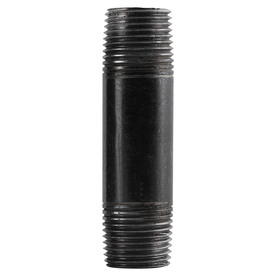
7. An Anvil
All you really need for an anvil is something hard and flat (no dirty jokes, I already have them in my head), Next you want it not to move or wiggle, energy spent moving or wiggling it, is wasted and does not go into the metal you are hammering.
Alot of folks go with railroad track to start, and that works (ti did for me)
If I was starting over, I'd go on ebay and google 'Random steel drops cut' or `steel 4140' and find a seller or two that sells the ends of big pieces of steel(called drops, cause its the bit that drops off when you cut it to length). I'd get carbon steel so it was tougher and when i got better i could heat treat it.
That or I'd find a big sledge hammer head and use that.. which ever was cheaper and easier
Then mount it in a piece of wood..
See my blog post on the subject for more info
http://forgetool.blogspot.com/2014/03/something-to-beat-upon-improvising.html
Here are listings for 4140 (a good steel for hammers and anvils)
http://www.ebay.com/bhp/4140-steel
If you have 2" by 2" and enough length to mount it to a log or stump that will do...
Here is one seller (Not the best,just the first I found) for tool steel drops
http://stores.ebay.com/Alro-Metals-Plus/Tool-Steel-/_i.html?_fsub=5042771014&_sid=824081774&_trksid=p4634.c0.m322
There is a piece of 2" x 2" by 4+ in that I'd get if I were buying it right now $14 (Shipping is $30, but I'm not including shipping here)
http://www.ebay.com/itm/4140-4-7-8X2-X2-ALLOY-TOOL-STEEL-STOCK-FOR-BRIDGEPORT-MILL-CNC-MILLING-MACHINE-/191355322513
If you go to your local Iron shop (most cities have several) and ask to go through their drops to buy a hunk of steel.. You can usually find something, and it's pretty cheap and no shipping. It will probably not be carbon, and will get dinged from your hammer during use, but it will work to start.. And its cheap.
Total $36
8. Pliers to use a temp tongs and for holding and bending hot metal, $4
http://www.harborfreight.com/10-inch-slip-joint-pliers-40702.html
Total $40
Around $40 and you can do basic forging (Well, plus the cost of whatever forge you build)... Still.. That's pretty sweet...but remember if you use them a lot, good tools are better..cheap tools bite you eventually(but as a smith you can make something else,out of them... )
There are several other posts on my site about making various cheap and easy types of tongs..
Here is a page with links to several better easy tong options..
the-tongs-page.html
Go here to learn where to learn to blacksmith:
http://forgetool.blogspot.com/2014/03/where-to-learn-wtf-im-doing-with-all.html
So where do you go from there... from here on the tool get more expensive, but they give large upgrades in capability
9. Small vice to hold your work.. sometime you need both hands to do something (Like twist hot metal, you'll see why later)
Having a third hand can be a god send in a lot of forging operations. Honestly you should buy the best vice you can, and a post vice or leg vice is way better for blacksmiths than a engineers vice (what is shown here) but this post is all about least cash for most bang..$28
The jaws are checkered to hold metal better, the should unscrew,and flip over and be smooth metal on the other side.. if they don't make a set of jaw covers our of scrap metal.
http://www.harborfreight.com/3-inch-swivel-vise-7421.html
Total $64
10. Put some holes in stuff, a drill and drill bits
You need to put holes in things like tongs and other tools, punching them will come later, for now you need a drill.
This drill is 1/2" a 3/8 drill will fit larger bits and be more useful. as I write this the 3/8" drill is on sale for less than the 1/2". but this drill will spin bits and make holes. $23
No good without Bits...
You need bits that go up to 1/4 inch.. You'll see why in a bit.. these are cheap ass drill bits..$4...but let me tell you... cheap drill bits will punish you every time you use the. If you have the money, jump straight to cobalt drill bits... not the brand, the metal... Cobalt is what you need to drill the hard stuff,and it goes through mild steel like it does not give a damn... If you possibly can go cobalt..
But this post is about cheap... and these are cheap.. and heat treated things from Harbor Freight are usually crap... I think I've said enough on that.
$4
pick up a couple wire wheels for cleaning things up too..but that's not on this list as it's optional.
Better Option:
cheap set of cobalt bits on amazon (I have not used this brand, but I LOVE my cobalt bits)
http://www.amazon.com/Neiko-Industrial-Cobalt-Coated-Pieces/dp/B002GQCT9Q/ref=sr_1_18?s=industrial&ie=UTF8&qid=1418191936&sr=1-18
Total $103
12. First Tongs
You now have enough tools to take on your first set of tongs...Emotionally, tongs made me feel like a 'Real' blacksmith... These are easy and a good place to start.. soon you'll be making better tongs. but I started here.
Now get some 1/8" thick, buy 3/4" wide (or what you have that's close) bar about 36" long and make a set of BSA Twist Tongs, easy as a first tong... but you'll need the drill the vice and a set of pliers listed above.(Or two pliers and no vise if you are a glutton for punishment) A vice makes these WAY Easier.
Look for the BSA tongs on this page:
http://forgetool.blogspot.com/2014/03/easy-cut-and-weld-tongs.html
Cost of the 1/8* 3/4" * 36' bar to make one of theses (Scrounge up your own nail for a rivet)
from home depot?
$3.52 = $4
These will be easier with a cheap adjustable wrench for twisting.. but you can make them with what you have.
If you are going to use a nail to make a rivet, soak it in vinegar for a day or two to take of the galvanizing, zinc smoke is bad , bad, bad for you.
Before you buy tongs, make a couple pairs of these.
Better option to buy: A wolfs Jaw tong is a fairly universal tong.. not great at and specific thing but ok at alot of things.
http://www.centaurforge.com/Wolfs-Jaw-Tongs/products/203/
If I were to buy tongs, I'd get wolf jaw in my metal range, then vbit bolt tong in my metal range, and make I'd make a couple set of BSA easy tongs (below) to handle the flat stuff
13. Speaking of a cheap adjustable end wrench
This is a 12" wrench, it's $7.. It's not ideal for twisting, but it's better than a pair of pliers... twisting square bar is like magic... It goes from Blah to fancy for almost zero effort.. It's just cool and easy... how can you pass that up...
http://www.harborfreight.com/12-inch-steel-adjustable-wrench-65802.html
If you have access to a welder, or a buddy with a welder, upgrade these to the
Better Twisting Wrench
Way better, super stupid easy.
Total $110
13. WAY WAY WAY better cutting.. Oh and grinding and basic sanding too.. and it's cheap...
http://www.harborfreight.com/4-12-in-43-amp-angle-grinder-60625.html
A Harbor freight grinder. 4" used to be the cheap ones, but the 4 1/2" are the cheapest now so get one of those. $19 regularly, on sale at the time of writing.. $14.. cheap for what you get.
Then pick up a assorted disk package too.. cutting and grinding disks, plus some flap wheels for sanding... $10
$30 for a TON of new ability to do things easy and fast. Make sure they are the same diameter as your grinder.
http://www.harborfreight.com/10-piece-4-1-2-half-inch-grinding-and-cutting-wheel-assortment-47572.html
You'll need ear protection, these things are loud a heck, but those orange foam ear plugs are cheap, just grab some.
Do not use these without eye protection.. every once in a while (never happened to me yet) these disks just up and explode.. you have been warned... Also, grinding.. bits are flying off, that's the point.. oh and don't remove the guard, no matter how good an idea it seems. Remember this mantra.. "Grinders feast on Human flesh"... Be smart, Be careful... but they are cheap and awesome...
These are so cheap, I have 3 one with each kind of disk on it, just so I don't have to stop and change... and if one dies, I can keep going, and wait for them to go on sale to get more.
I've had these last for decades, and I've had these die in 3 days.. I used to have a nice quality makita grinder, but My dad needed it and it's been his even since.. been his for 20 years still works great. I think it cost $40 at the time, maybe $70 now... In that time I've been through 8 of these cheap grinders.. You do the math...
If you have been doing everything by hand, then these will give you great power.. but with great power comes the ability to cut your hand all to hell.. be smart.
Better Option: Go with a Brand name like Makita.
Total $140
$140 is not cheap, but if you pick up a tool or two at a time, you can do this easy. Much abilty, not much price.
Where Next?
On the uber chep you need a small stick welder, just so you can stick things together to make tools on your own. A welder is another one of those things were spending more money up front get's you a much better tool.
As a general rule stick<mig<tig, so stick is the worst, but for this kind of stuff, skip those cheap flux core Mig welders, they work, but the flux core wire spatters little balls everywhere. I had one for years, you spend 4 times longer grinding all the spatter away then you do welding... If it is at all possible to get someone to teach you use teh welder before you go at it.. otherwise soak up youtube welding instruction videos about your type (stick mig tig)for a couple days before you start.
That said, a decent cheap welder
My dad bought one of these for his ranch, it uses the tiny welding rods, but it's cheap, simple, and it sticks two pieces of metal together... we load it in a cart (think little red wagon, but a hair bigger) with a generator and take it where ever we need to weld and it does the job.
Stick with the tiny electrodes that come with it, don't try upgrading to the "normal" sized ones, we tried it and this thing can't keep a steady arc.
Normally $100, currently on sale for $80 at time of writing.
Better Option:
If you are going to drop big money, and have not welded yet, get a
good quality non flux mig welder... using one of these once you get it
adjusted for the thickness of metal you are welding it about as easy as
using a hot glue gun. If you can afford it Lincoln or Miller are great brands.(my Tig is a miller Diversion 180, she ain't cheap, but she's nice)
Masks...
Do your self a favor, don't' try to use the crappy welding mask that comes with it.
Just don't try to weld with one hand holding the mask, get one that straps on your head.
Which one? Get and adjustable shade auto darkening helmet..
Basically when you are not welding it's light enough to see through the glass in front.. So you can hold things in position.. Then when you start to weld it automatically gets dark enough to protect your eyes.. There is a little knob so you can adjust how dark so you can really see what you are welding, not just the arc puddle. When I was learning to stick weld, the hardest part was learning to put the electrode right where you wanted it to start the puddle.. One of these helmets skips completely over that and makes it trivial.
Skip the very lowest priced one at harbor freight, the lens part works great, but the plastic of the mask and headband, is too thin and the helmet falls apart, skip up to the next up the one with cheap flame stickers on it. it's a much sturdier helmet.
http://www.harborfreight.com/blue-flame-design-auto-darkening-welding-helmet-91214.html
Price Normally $90, on sale for $55.For a $200 buy in, you can now make just about any tool you want for blacksmithing...that's a HUGE upgrade... Definitely wait for these to go on sale and get one of the 20% off any one item coupons.
Total $340...
That sounds like a lot to a poor college student and it is, but put $10 a week into a jar and get the tools as you can afford them. In a year you will have all of them.
Remember, the basic set was $40...plus a cheap forge...Not to shabby to get started.


