Wednesday, December 30, 2015
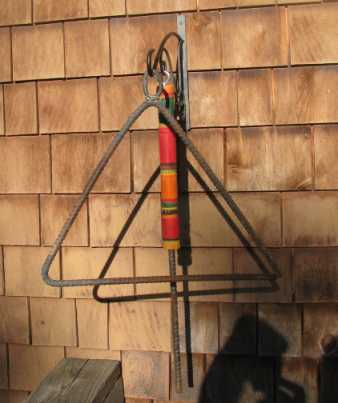
Lesson learned about forging fire steels
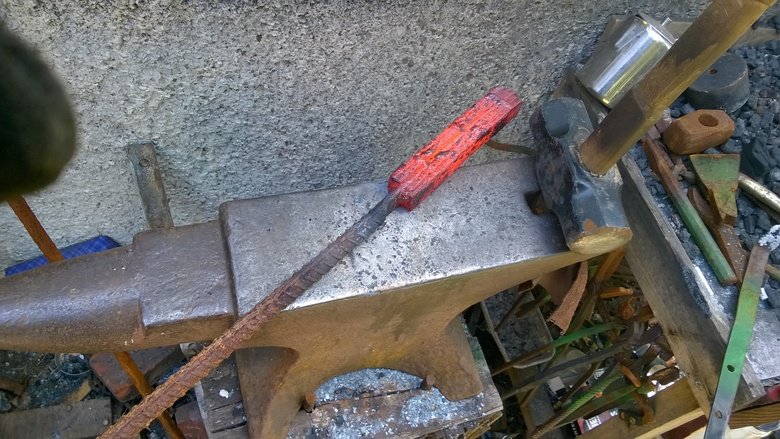
So I whipped up a couple fire steels out of garage door spring I had lieing around.
Hardened them up like the dickens... tempered the handle all the way down.. left the striking part hard.. and they didnt' work for crap...
Looked at the one I bought on line.. the whole striking surface was ground smooth and shiny.. and the edges of the striking surface were slightly rounded.
Looked at mine.. the striking edge was wavy lumpy, square and covred in forge scael
Went and ground mine smooth, no lumps, rounded the edges (careful not to let it get to hot to touch, or change colors) on both my steels, now they spark better than the one bought online!
Booyah!
Building a Darn Frosty's Tee Burner
So I'm trying to build a Frosty's Tee Burner...
Let me start off by saying I'm a reasonably tool savvy guy, I do black smithing, work on my own car, make armor, weld, have all the normal wood working tools, and a few specialized metal tools, like a mini metal lathe...
That said, for a burner that's supposed to take 20 min and cost $20, sure as hell isn't. Mostly it's because of tools i needed to buy, wrong tools, tools not working how I expected (IE drill bit I had was to long to fit on lathe once tee was chucked up etc., etc...) It's been nothing but tiny steps forward, followed by heading to the internet to buy another part.
So I'm putting this blog post together to document the process so you can learn from my mistakes... and to link the exact parts I'm buying for each step... So you don't get the wrong ones...and maybe to earn enough in referrals to by myself a free black Smithing book once a decade or so. :D
So if I can I'll link to amazon..
First off, here is the exact Tweeco Mig tip I ordered... I'll let you know if it works, as the .035 tips I had for my harbor freight flux Mig welder did not (The welder is long gone, but the tips are still here)
$1 Prime shipped tweeco mig tip
This is one tip, but a pack of 10 from other places are $18... so order several
Tee Fittings:
I've ordered 4 different tee fittings online and every single one has been the wrong type where the "straight line" fittings are 1" & 3/4" and the 90degree fitting is 1"... IE The kind you need for make a side arm burner, but not the kind you need for a tee burner...
Wrong kind: 3/4" left, 1" up (or down) and 1" Right
(Image is for shape, ignore the sizes on the pictured fittings)

Right kind: 1" left, 1" right, 3/4 down(or up).
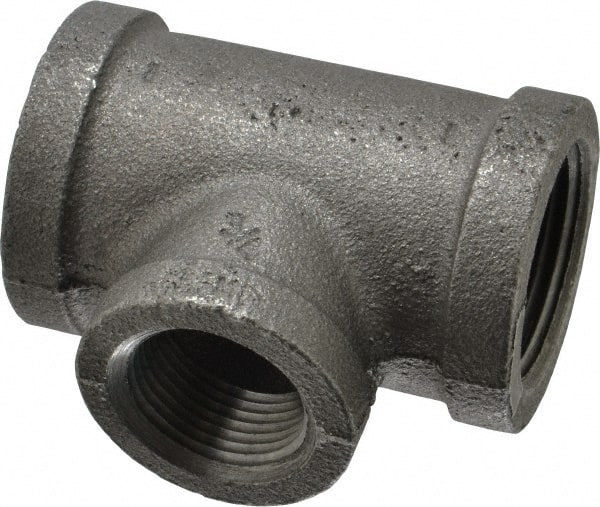
So my advice is, just go to a plumbing supply place where you can be sure you got the right one..If I find a place where I can get the correct ones I'll link to them. Ordering them Prime shipped from Amazon is roughly $10 each...
You need to be aware that I'm not following Frosty's plans exactly, I'm replacing the copper flare fittings with short runs of copper pipe and propane quick connectors, to match my existing forge..
After I use a part and it's the correct part and works I'll add it to the list here at the Bottom:
Steps I've done so far.
Ordered wrong tee fitting #1
Ordered wrong tee fitting #2
Bought correct Tee fitting at plumbing store in person
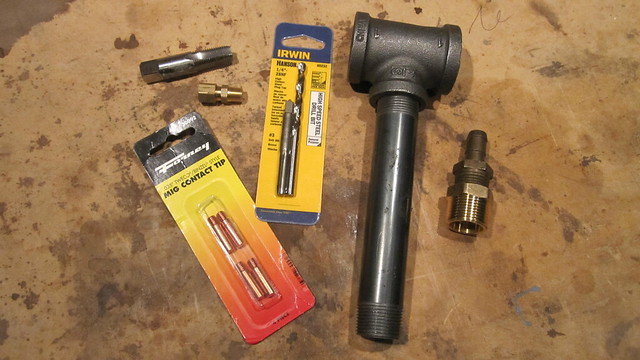
Bought a bunch of parts on amazon
Tried to put correct tee fitting into my mini metal lathe, didn't fit ordered close pipe nipple to chuck up and screw fitting onto.
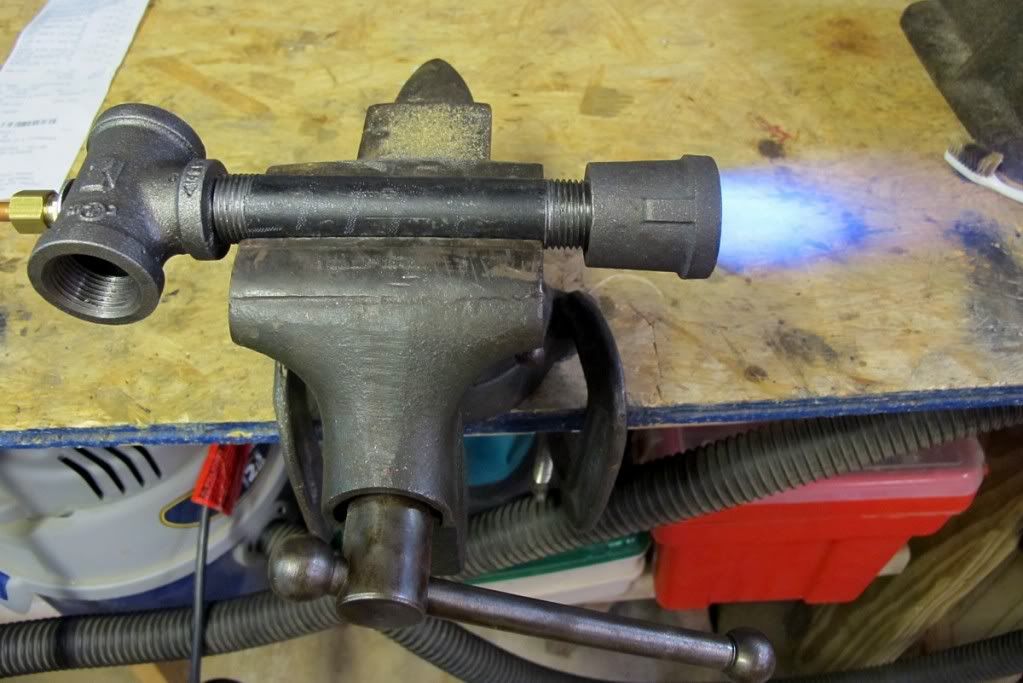
Chucked up close nipple to put te onn to drill hole in center of tee fitting... Hole NOt drilled in center of tee fitting.
Ground a Flat spot on tee fitting, so bit will not wander to drill off center hole... Test fit before drilling this time... bit not on center of tee fitting. Adjusted close pipe nipple to it's properly centered
Don't use close pipe nipple, as the screw thread is tapered.. Making it a huge pain to get straight
Get a longer fitting and cut it in half so you can chuck it up on the pipe not the threads... fording it to chuck up straight the first time
Failed parts
Be
aware the common 1/4" tap is 1/4-20, not 1/4-28, I pulled the 1/4 in
tap out of my tool box, double checked the instructions,
it tapped fine but then hole tapped was too large for the mig tip,. Wound up going with the straight frosty desing to get fittgins that would tap correctly
Verified Correct Parts:
Note: this did not fit the tap handle I had that the other tap fit into... You need a larger capacity tap handle
UN Verified Parts:
Be careful, the normal 1/4 in tap, is 1/4-20, not 1/4-28, that's another trip to Amazon for me!
Tweeco is the Magic word on the mig tips, the ones i had around the shop did not fit... back to the internet!
My current choice of the correct Tee Fitting
The secret appears to be 1X1X3/4 not 1X3/4X1, at least the one pictured is correct.
I ordered one from Amazon to test this theory. I'll let you know how it comes out.
This has several virtues, 1 it has a valve already in it, that valve on my current forge is super handy. #2 if something goes wrong my the new forge I can quickly disconnect the propane. #3 easy to unhook to move around and swap forges for testing. #4 The cheap Chinese forge I got on ebay many years ago, came with this on it...(Boy I wish I could get another one.. $160, with regulator & hoses.. been a great little forge)
It fits fine, just not moving it till I fire up the burner.
The one on my cheap Chinese forge came with a gauge and a needle valve, this one is cheaper and comes with a braided hose, I'll let you know how it works out.
Tuesday, December 29, 2015
Frosty T burner, Tee burner, How to find the actual instructions
I bumped into this great video of a Frosty T burner, and it made me want to try to make one...
Frosty T Burner Build on YouTube
Easy, cheap, and simple to build.. plus it's remarkably forgiving and works across a wide range of pressures? What could possibly be wrong, I must make one!!!

I then spent the next few days finding various evolution of the instructions, all of which referred to a new, better stronger easier version of the instruction... which I could never find, despite the fact' that I'm already a member of IForgeIron , the site were I KNEW the instructions were posted...
So to save you from my suffering, here they are.
Post on Iforge Iron with link to frostys fancied up instructions
I'll post more once I've actually made one, in theory i finally have all the parts I need
I had to get stubby drill bits because my HarborFreight Metal lathe was too tiny...
Saturday, October 31, 2015
Historical Improvised fluxes
I was curious about "improvised" welding flux, so i went historical... did some web surfing...didn't;' keep links, just notes, I'll post links as i re find them
old ingredients:
Silica sand, Powdered egg shells, Powdered marble, white sand, quartz sand, any straw the bears silica in it, (rice, etc), fine steel/iron filings, ground glass, powdered charcoal (additive), powdered potters clay, powdered slag, salt
old ingredients:
Silica sand, Powdered egg shells, Powdered marble, white sand, quartz sand, any straw the bears silica in it, (rice, etc), fine steel/iron filings, ground glass, powdered charcoal (additive), powdered potters clay, powdered slag, salt
there
was discussion on these above for old WI and maybe mild, but modern
steels required different fluxes (thus why they faded away)
Newer:
Borax, Boric acid,
a lot of these require some mixing... the marble and eggsheel were mentioned specifically as needing some sand for example as wihtout it they for a refractory compound...
Here is an interesting article on components of old commercial fluxes...

http://blacksmith.org/forge-welding-flux-recipes/
http://www.bladesmithsforum.com/index.php?showtopic=30094
Charcoal Ash or Mud Dauber nests(they only used good high silica clay)
http://www.iforgeiron.com/topic/2582-sand-used-as-a-flux/
Anyone using any of these still? it seems like a useful piece of data to have stuck in ones head...
Newer:
Borax, Boric acid,
a lot of these require some mixing... the marble and eggsheel were mentioned specifically as needing some sand for example as wihtout it they for a refractory compound...
Here is an interesting article on components of old commercial fluxes...
http://blacksmith.org/forge-welding-flux-recipes/
http://www.bladesmithsforum.com/index.php?showtopic=30094
Charcoal Ash or Mud Dauber nests(they only used good high silica clay)
http://www.iforgeiron.com/topic/2582-sand-used-as-a-flux/
Anyone using any of these still? it seems like a useful piece of data to have stuck in ones head...
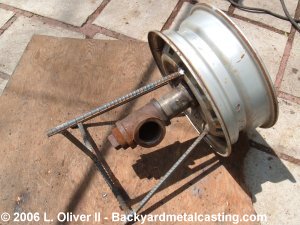
Inexpensive Metal Air gates, for controlling your blower....
Inexpensive Metal and or Plastic Air gates, for controlling your blower....
A lot of places air gates are stupid expensive... they are probably worth it but when you are staring out you need a cheap alternative... that's what these are.. easy to get not to expensive. Obviously the plastic ones need to be kept away from your heat, and need to be on the blower end. and aluminum ones shouldn't get too hot... but this will let you control the air for a decent price.

4" Rockler on Amazon around $13

2.5" wood tech aluminum

Woodteck 3" aluminum around $13
There are more in amazon, just search "blast gate" or "air gate"

Wood stock 3" air gate on Amazon Around $20(plastic)

2.5" powertech, around $10 (plastic)
2.5" powertech around$6 (add on)(plastic)
Tuesday, October 13, 2015
Putting Together an Early Period Smithing Kit
So here is my Goal
Find places to buy hammers and tools that will pass the 10ft rule to be used as early period hammers.
I'm not focusing on Viking Blacksmith, or Anglo-Saxon Blacksmith ..Just in the ball park for now... But trying not to spend all the money on custom made period style hammers.. here is one around $40,

2.2 lb basic Cross pein hammer
You might be able to find it cheaper, but when I added shipping and import taxes, this was the best.
it'll need pant remover for the head, and a little black paint to cover the modern wedge... sand off the handle varnish ( stamps, and i think it'll do ok...

Bigger simple hammer Around $26
Or

This one might take more work to cover the stamp int eh head, but at $12 it possibly still worth it...
Wis it didn't have the Stamp in the metal, wonder if you remove the head and put it back on upside down to hide it..
Reproduction Viking era hammer, 66-77 bucks (two slightly different designs)
You might have to handle it your self
Talerwin forge

A cast ductile steel anvil, that's made by Fort Voss Outfitters, if it didn't have letters cast on the side I'd like it a lot better. You have to pull down their price list and then get a hold of them, but they make nice reproduction anvils for lots of historical periods.
Scythe supply(Scroll down)
Expensive Picard hammers
(This shape has many names, Scythe hammer, British scaling hammer, etc)

Here are some ok ones for a good price from the hammer supply guy..

Machinist_Hammers
Another cheap one from Hammer Supply Guy (Peen on one end, point on the other)

German_Pattern_Scaling_Hammer
Two Different Scythe Hammers here (good one is out of stock)

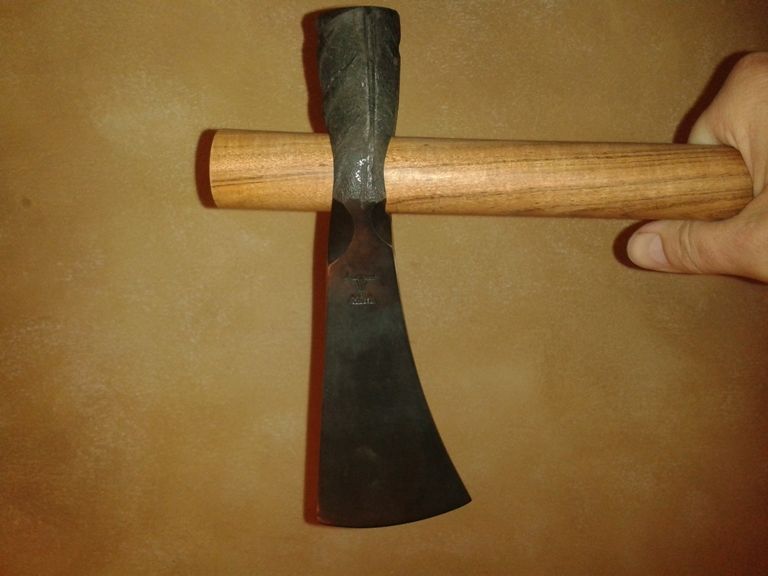
Specialized Blacksmith Hammers
Broad Axe(picard 1kg machinists hammerHatchet)

Vaughan_Broad_Hatchet_28_oz
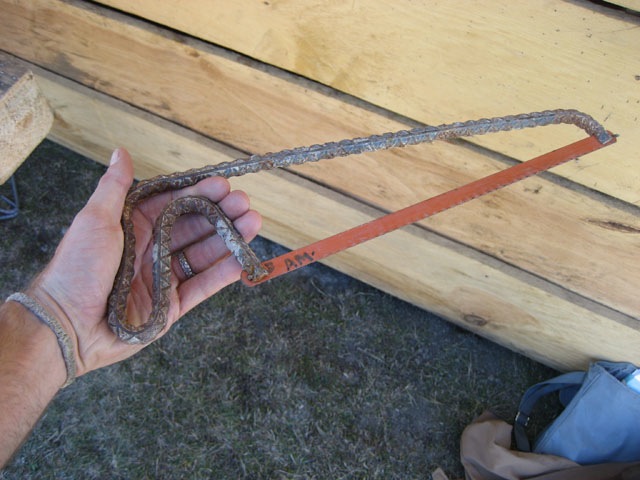
small hacksaw(modern blade)
Best place to get a deal on a "cheap" 2lb rounding hammer...
When I first hear about rounding hammers and watched some of Brian Brazeal's videos,
I Knew i wanted to try one, but i didn't want to blow a lot of cash, just to see if I liked it...
I dug around and found this is the least expensive brand.. Nordic...
And this was the best priced place i found.. it might not be the absolute best now, I can't vouch for that
but getting one to Try for around $30 was a good deal to me... and it still is...

Centaur Forge has the same hammer for $26, so just work out the shipping, Centaur is great!
I enjoyed playing with it and hope you do too.. it turned out to be a really nice hammer. and works great.
This second site is a great place to get lots of kinds of hammers...
hammersource.com
a differnt inexpensive rounding hammer, but 3l.d $15
Saturday, October 10, 2015


Subscribe to:
Posts (Atom)